Das Coronavirus stellt uns momentan vor einige große Herausforderungen und besonders Arbeitgeber und Arbeitnehmer müssen sich aufgrund der empfohlenen Vorsichtsmaßnahmen kurzfristig überlegen, wie sie die Geschäftsfähigkeit ihres Unternehmens weiterhin sicherstellen. Dabei folgen bereits viele Unternehmen der Empfehlung, ihre Mitarbeiter im Homeoffice arbeiten zu lassen. Damit sollen soziale Kontakte auf ein Minimum reduziert und die Ausbreitung des Coronavirus verlangsamt werden.
Die Möglichkeit des Homeoffice wird allerdings nicht nur im Zusammenhang mit dem Coronavirus diskutiert. Schon seit einiger Zeit stellt das Homeoffice eine sinnvolle Option durch die zunehmende Digitalisierung dar und ist ein häufiger Benefit für Arbeitnehmer hinsichtlich Work-Life-Balance und Vertrauensarbeitszeit.
Im Homeoffice selbst benötigen wir, genau wie im Büro, unsere Hard- und Software, um uneingeschränkt arbeiten zu können. So gibt es Arbeitnehmer, die sich die vollständige Büroausstattung inklusive PC, mehreren Bildschirmen, Tastatur, Maus und Telefon in den eigenen vier Wänden aufbauen. Anderen genügt der Laptop, um ihren täglichen Aufgaben nachgehen zu können.
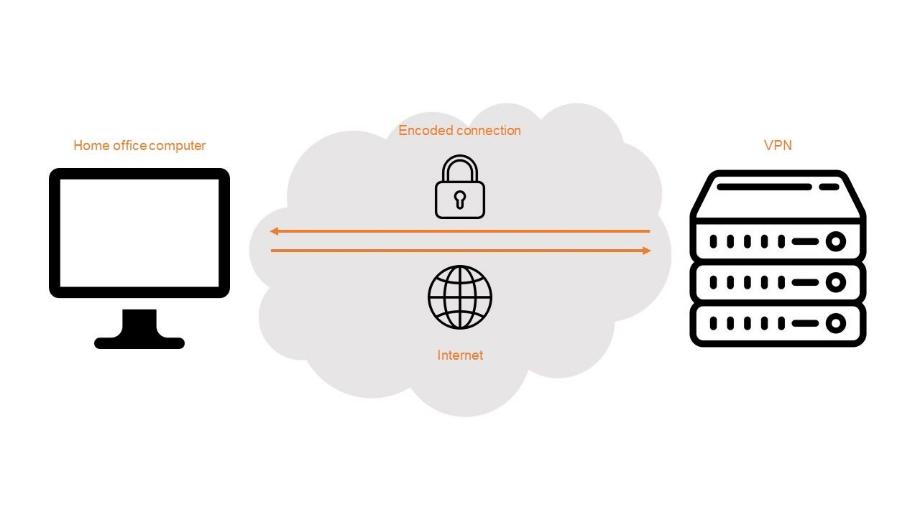
Ob im Büro oder zu Hause, eines der wichtigsten Themen ist die Sicherheit der IT beziehungsweise der internen Daten. Auch im Homeoffice müssen Mitarbeiter auf das unternehmenseigene ERP-System und die Server zugreifen oder sensible Daten austauschen. Dafür empfiehlt sich die Einrichtung eines VPN-Servers, mit dem sich die Mitarbeiter im Homeoffice verbinden und somit uneingeschränkten Zugriff auf alle Unternehmensinformationen haben.
Das VPN, Virtual Private Network (deutsch: Virtuelles privates Netzwerk), bietet also die Möglichkeit, sich im unternehmenseigenen Netzwerk zu bewegen und Daten sicher zu bearbeiten. In unserem heutigen Blog zeigen wir Ihnen, wie Sie auch in Ihrem Unternehmen ganz einfach einen VPN-Server mittels IPFire einrichten können.
Der Download von IPFire erfolgt zum Beispiel über die Website von IPFire. Bei der Installation wählen wir die gewünschte Sprache, bestätigen die Lizenz und wählen sowohl den Datenträger für die Installation sowie das entsprechende Dateisystem.

Anschließend gelangen wir in das Setup. Dort wählen wir unsere Tastaturbelegung und unsere Zeitzone aus und setzen den Host- und Domainnamen sowie jeweils ein Passwort für "root" und "admin". Im nächsten Schritt kümmern wir uns um die Netzwerkkonfiguration.
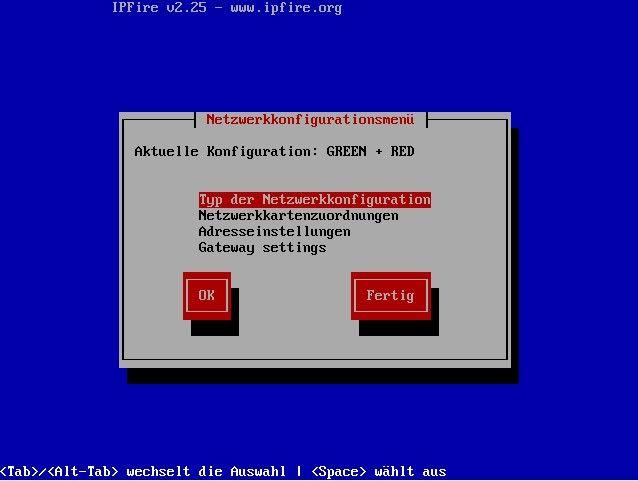
Unter "Typ der Netzwerkkonfiguration" können verschiedene Netzwerkkonfigurationstypen ausgewählt werden. Dabei behalten wir den voreingestellten Typ GREEN + RED für eine einfache VPN-Konfiguration bei. Innerhalb der "Netzwerkkartenzuordnung" ordnen wir nun den Schnittstellen GREEN und RED eine Netzwerkkarte zu. Dabei muss die Netzwerkkarte, die mit dem Internet verbunden werden soll, als RED und die Netzwerkkarte für das interne Netzwerk als GREEN definiert werden.
In den "Adresseinstellungen" weisen wir der Schnittstelle GREEN eine IPv4-Adresse zu, mit welcher die IPFire im internen Netzwerk erreichbar ist. Zusätzlich weisen wir der Schnittstelle RED zu, wie diese ihre IP-Adresse erhält. Dabei wählen wir zwischen "Statisch", "DHCP" und "PPPoE" aus.
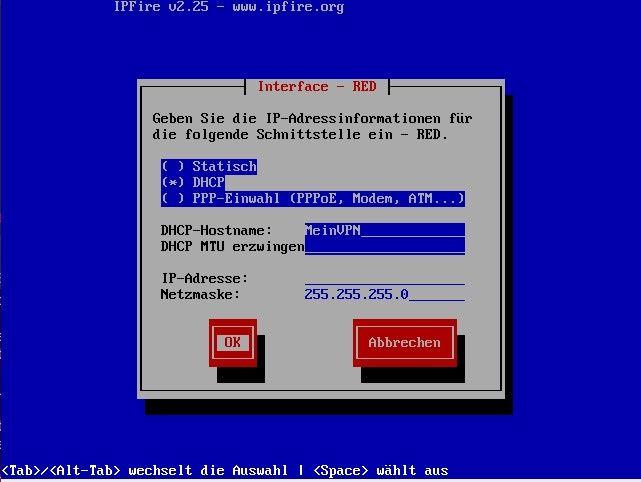
Die "Gateway Settings" müssen wir zwingend definieren, wenn eine statische IP-Adresse für die Schnittstelle ROT verwendet wird. Haben wir nun unsere Netzwerkkonfiguration abgeschlossen, bestätigen wir mit "Fertig". Im nächsten Schritt erfolgt die Konfiguration des VPN über Dienste --> OpenVPN.
In den globalen Einstellungen ist der wichtigste Eintrag der "Lokaler VPN Hostname/IP". Besitzt unser Unternehmen eine feste IP-Adresse für die Internetverbindung oder existiert für diese feste IP-Adresse ein DNS-Name, dann tragen wir diese hier ein. Steht uns nur eine ADSL-/VDSL-Leitung mit wechselnden IP-Adressen zur Verfügung, binden wir die IP vorher über einen DynDNS-Dienst, zum Beispiel www.noip.com, ein. Die Einbindung des DynDNS-Dienstes können wir auch in der IPFire vornehmen. In diesem Fall tragen wir den DynDNS-Namen in das Feld "Lokaler VPN Hostname/IP" ein.
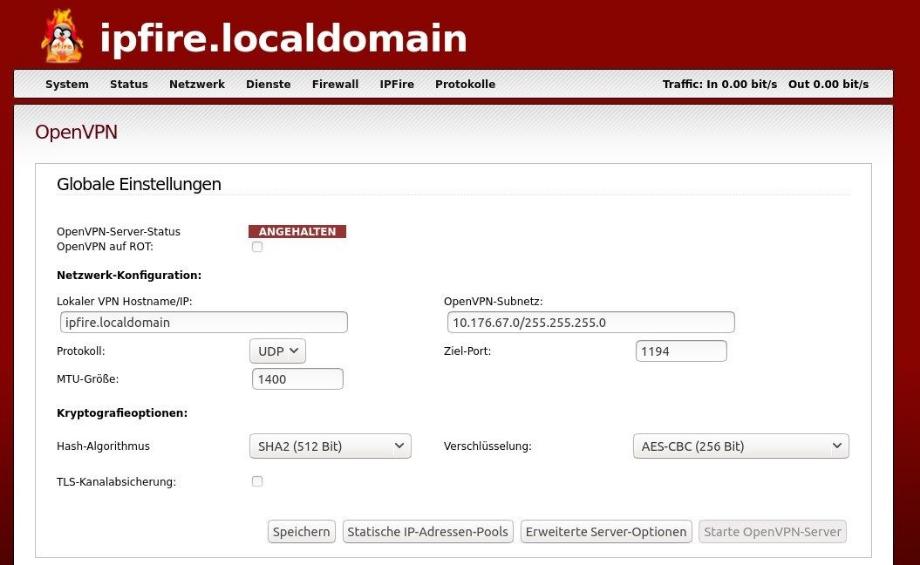
Das "OpenVPN-Subnetz" ist das Netzwerk, welches für das Routing auf dem Internetgateway eingesetzt wird (wie oben beschrieben), wenn die IPFire nicht ihr Default-Gateway ist. Werden aus sicherheitsrelevanten Gründen weitere Subnetze benötigt, können wir diese unter "Statische IP-Adressen-Pools" hinzufügen. Unter "Erweiterte Server-Optionen" empfiehlt es sich, die Option "mssfix" zu aktivieren. Anschließend speichern wir unsere Änderungen.
Im nächsten Schritt erzeugen wir im Bereich "Zertifizierungsstelle und -schlüssel" die "Root/Host-Zertifikate". Das kann eine kurze Zeit in Anspruch nehmen.
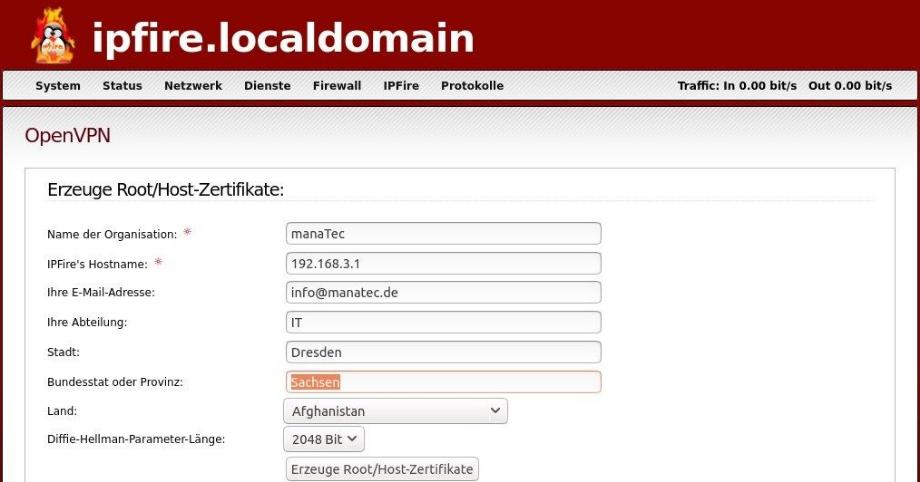
Nach der Erstellung des Zertifikates kann der OpenVPN-Server gestartet werden. Dazu setzen wir in den globalen Einstellungen den Haken in OpenVPN auf ROT und starten den Server mittels "Starte OpenVPN-Server". Wollen wir nachträglich Änderungen in den Einstellungen vornehmen, stoppen wir den Server vorübergehend.
Nun legen wir die VPN-Nutzer an. Im Bereich "Verbindungsstatus und -kontrolle" fügen wir über den Button "Hinzufügen" einen neuen Nutzer hinzu. Darauf folgt die Auswahl des Verbindungstyps, wobei das "Host-zu-Netz Virtual Privat Network (RoadWarrior)" die richtige Auswahl für das Arbeiten im Homeoffice ist.
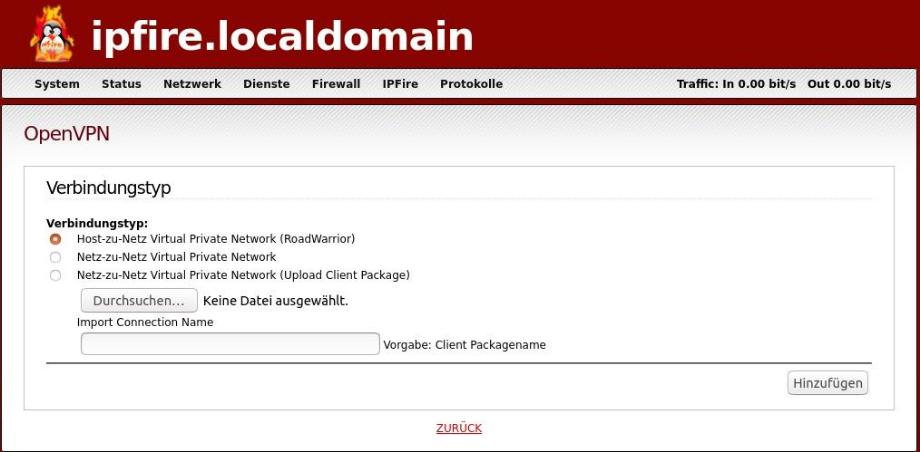
Die darauffolgende Konfigurationsseite ist in drei Teile gegliedert, wobei alle mit einem roten Stern markierten Felder Pflichtfelder sind. In der Sektion "Verbindung" geben wir einen Namen für die Clientverbindung an, welcher keine Leerzeichen enthalten darf. Für den Fall, dass wir weitere VPN-Subnetze angelegt haben, könnten wir diese unter "Netzwerk auswählen" nutzen.

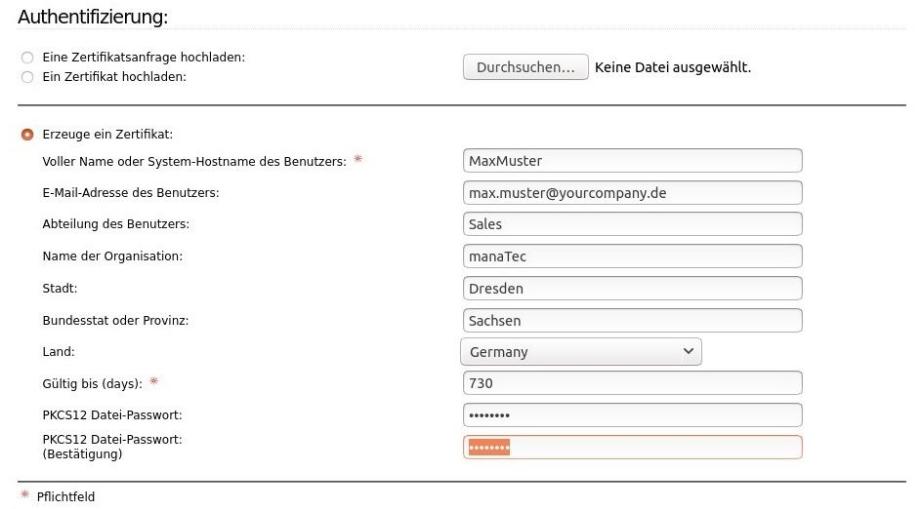
In der Sektion "Authentifizierung" geben wir den Namen und die Gültigkeit des Nutzers an. Außerdem empfehlen wir die Eingabe eines Passwortes, um das Zertifikat entschlüsseln zu können.
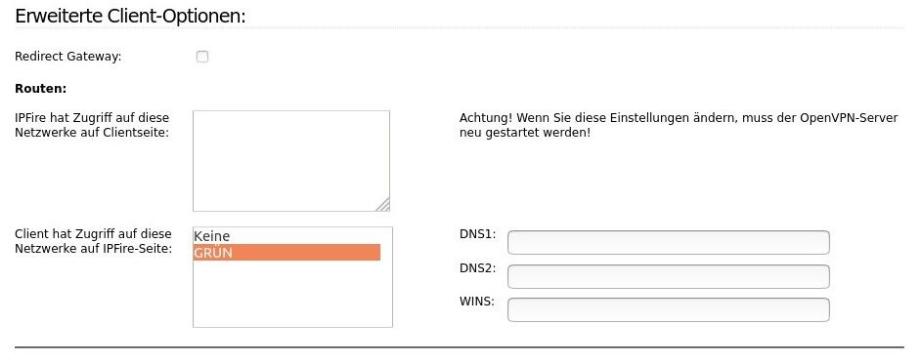
Die Sektion "Erweiterte Client-Optionen" bleibt unverändert. Durch das Speichern der Eingaben wird der neue VPN-Nutzer angelegt.
In der Sektion "Verbindungsstatus und -kontrolle" der OpenVPN-Übersicht werden uns nun alle angelegten Nutzer angezeigt. Damit das VPN auf dem Client verfügbar ist, muss dieser das Clientpaket bekommen. Die Legende zeigt dabei das entsprechende Symbol.

Um den VPN-Client einzurichten, laden wir den Client unter www.openvpn.net herunter. Nachdem wir den VPN-Client installiert und gestartet haben, erscheint das Symbol in der rechten unteren Taskleiste. Anschließend entpacken wir das entsprechende Clientpaket, welches aus zwei Dateien besteht - eine VPNName.ovpn-Datei und ein Zertifikat.
Durch Rechtsklick auf das VPN-Symbol des Clients importieren wir die .ovpn-Datei, welche zusätzlich in den Ordner c:\Benutzer\Name\OpenVPN\config\OpenVPNName\ kopiert wird. Die Zertifikat-Datei kopieren wir ebenfalls in diesen Ordner.
Nun können wir das VPN verbinden, entweder mittels Doppelklick auf das VPN-Symbol oder durch Rechtsklick auf das VPN-Symbol und "Verbinden". Für die erstmalige Verbindung des VPN-Clients benötigen wir administrative Rechte.
Die gesamte Einrichtung und Konfiguration erfolgt im besten Fall durch den IT-Administrator des Unternehmens. Einmal eingerichtet, lassen sich beliebig viele Nutzer hinzufügen und die Einrichtung in wenigen Schritten durchführen. Der Konfigurationsaufwand lohnt sich nicht nur wegen des möglichen Zugriffes auf das unternehmensinterne Netzwerk aus dem Homeoffice, sondern auch wegen der Sicherheit bei der Bearbeitung oder dem Austausch von sensiblen Daten.
Sie möchten Ihren Mitarbeitern die Arbeit im Homeoffice ermöglichen und sind auf der Suche nach einem zuverlässigen Partner für Ihren IT-Support? Kontaktieren Sie uns jetzt und wir stehen Ihnen jederzeit zur Seite!
Quellen: www.t3n.de, www.wikipedia.org, www.ipfire.org, www.openvpn.net, www.noip.com
Einrichtung eines VPN-Servers mittels IPFire