The introduction of Odoo 17 has resulted in significant changes in the manufacturing area. As already mentioned in our previous blog post on the topic of „Collaboration in Product Lifecycle Management (PLM)“ it is now necessary to install the app „Quality“ in order to be able to carry out manufacturing steps after the introduction of the workshop app. In this post, we will go into the process in detail, in particular using a practical example - the production of a canvas.
A practical example: the production of a canvas
The production steps include sawing and sanding wooden slats, assembling wooden blanks into a frame with glue and screws and covering the frame with a canvas.
Simplifying assumptions made
- Everything is stored in a parts list without subparts lists. However, Odoo also makes it easy to pack parts lists into parts lists. For example, the parts list "Frame" could be placed in the parts list "Finished canvas".
- We have all products directly in stock. For example, there is no automatic replenishment. However, Odoo also offers the option of ordering as required with minimum stock or even seamlessly with Just In Time (JIT) setup.
- We do not recycle the by-products of production, such as sawdust, and we do not have to track the electricity consumption for production.
General settings to be made
Before we start the actual process, some general settings need to be made. These include the activation of batch and serial numbers, the activation of units of measurement, the activation of variants and the configuration of work orders, work order dependencies, workshop and quality.
Creation and correct configuration of the products

First, the products are created. In this case, it makes sense to create canvas 1 to 4 as stockable products (alternatively, the wooden slats can also be created as consumables), the screws and stapler needles as consumables and the finished canvases each with tracking by lot numbers. Furthermore, the finished canvas has two variants: 20x20 cm and 80x100 cm.
If all parts of the parts list are tracked with lot numbers, production becomes somewhat more complex, as the lot number must be selected before the component is processed. In this example, we can see that the products have been created with different units of measurement: Unit (en), cm as well as dm². The latter had to be created first, as Odoo only stores m² in the standard system. Only the end product "Finished canvas" contains the route "Production", the components each contain "Purchase".

Creating the parts list
This is done either by following the "Parts list" smart button in the final product or by going to the "Production" module and following the path Products → Bill of material (BOM). We now have to create two BOM here, as the canvases require different amounts of material or components depending on their size and are therefore also differently expensive and complex to manufacture. Below you can see the BOM for the larger canvas. Correspondingly, the smaller one must also be created with reduced consumption.

Now we need work centers and the production steps ("operations"), which belong in the "Operations" tab as soon as they have been created:

Creation of workstations and processes
First, the required workstations for the canvases are created in the "Production" module under the path Configuration → Workstations.

The processes are configured from the same module under the path Configuration → Processes. The following is an example of one of the processes:

The configured operations are now stored in the parts list under the "Operations" tab:

To give the tasks a sensible sequence, activate the "Task dependencies" under the "Other" tab. You can then store the previously required tasks in the tasks by going to a task and activating the "Blocked by" column in the table view using the slider at the top right. We can also change the order of the tasks using drag & drop:

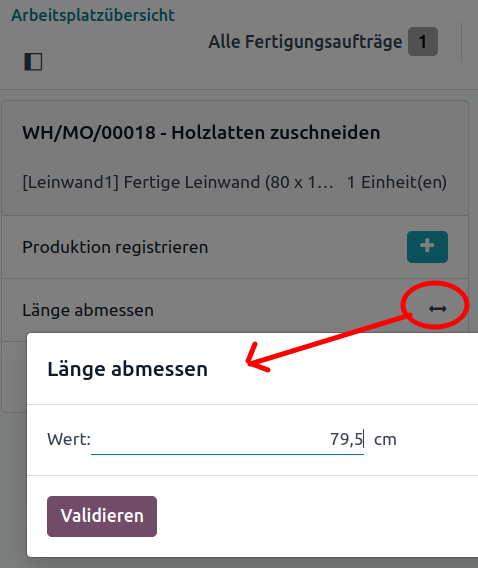
Once the workstations and operations have been configured, the production employee receives the following overview after the production order has been created:

In previous versions of Odoo, clicking on the screen icon opened the so-called tablet view. As of Odoo 17, this opens the new Workshop module with the workstation overview:

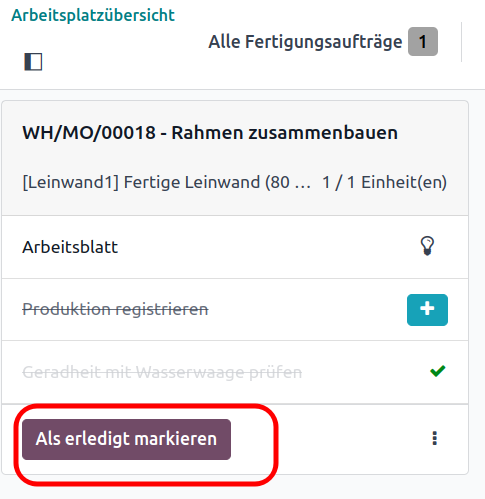
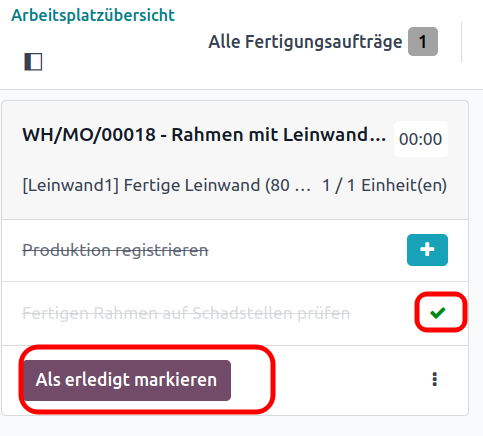
By clicking on the gray area where the number of the production order can be seen, time recording is also started. After a task has been completed using the "Mark as completed" button, this task fades and the following view opens:

The empty overview shows that there is currently nothing more to do at the miter saw workstation. You can also see that a work order is open at another workstation.
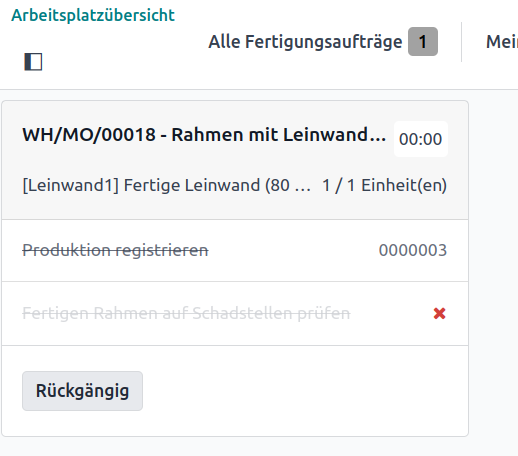
In the employee's production order, it is possible to simply skip the individual work steps by entering a batch number using the blue plus in the following screenshot for the end product and then clicking on "Close production". In this case, the "Assemble frame" step at the workbench would be skipped.

This can only be prevented by adding quality points. This is generally recommended in order to be able to subdivide operations even further. For example, the miter sawing operation can be divided into "cutting to length", "drawing in" and "sawing".
Configuration of quality points
To configure these steps, we switch to the Quality module and follow the path Quality control points → Control points. Here we enter the product of the finished canvas, the production process and the exact production step, such as "Cut wooden slats", as the work order process:

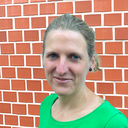
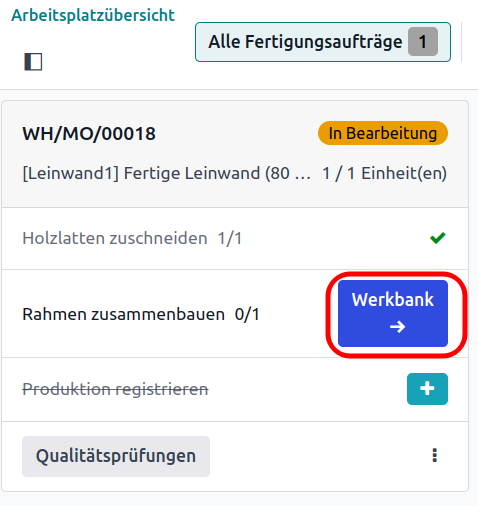
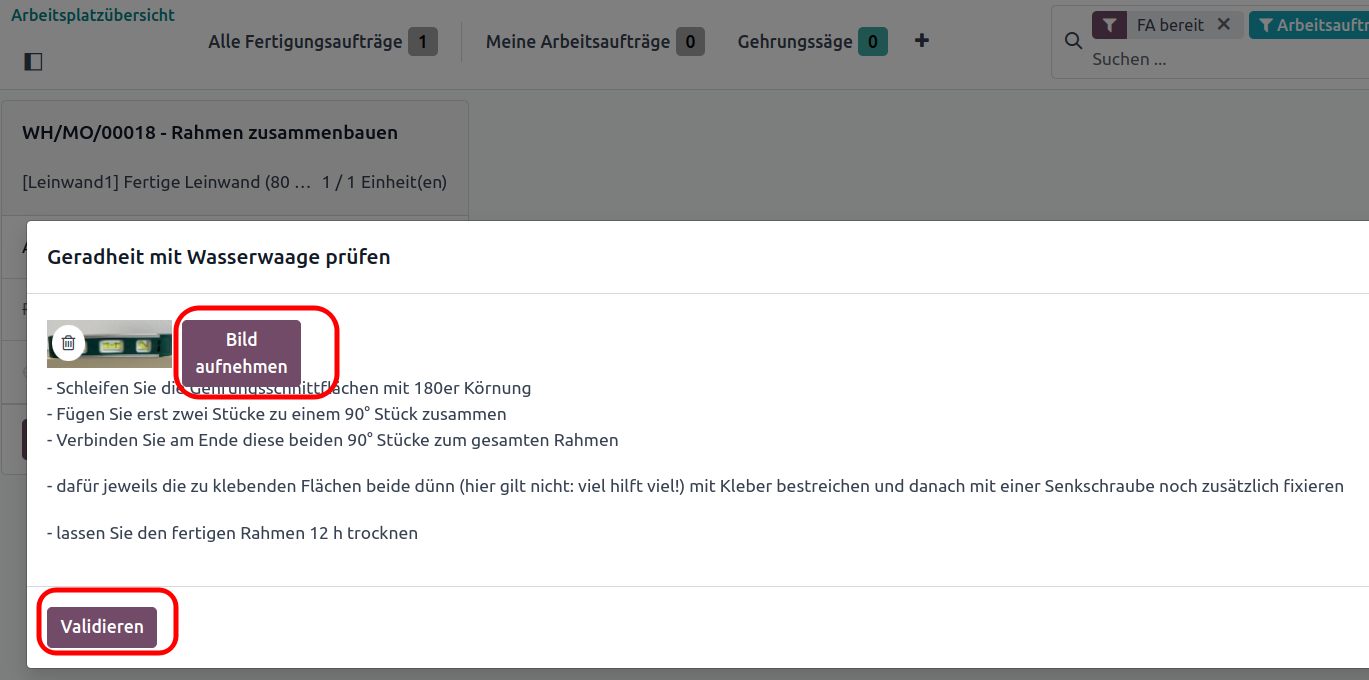
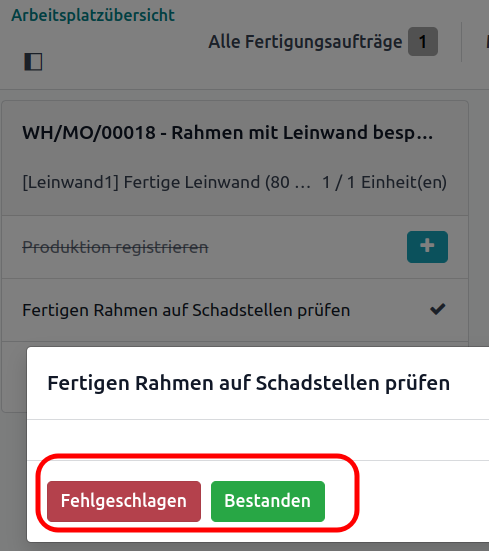
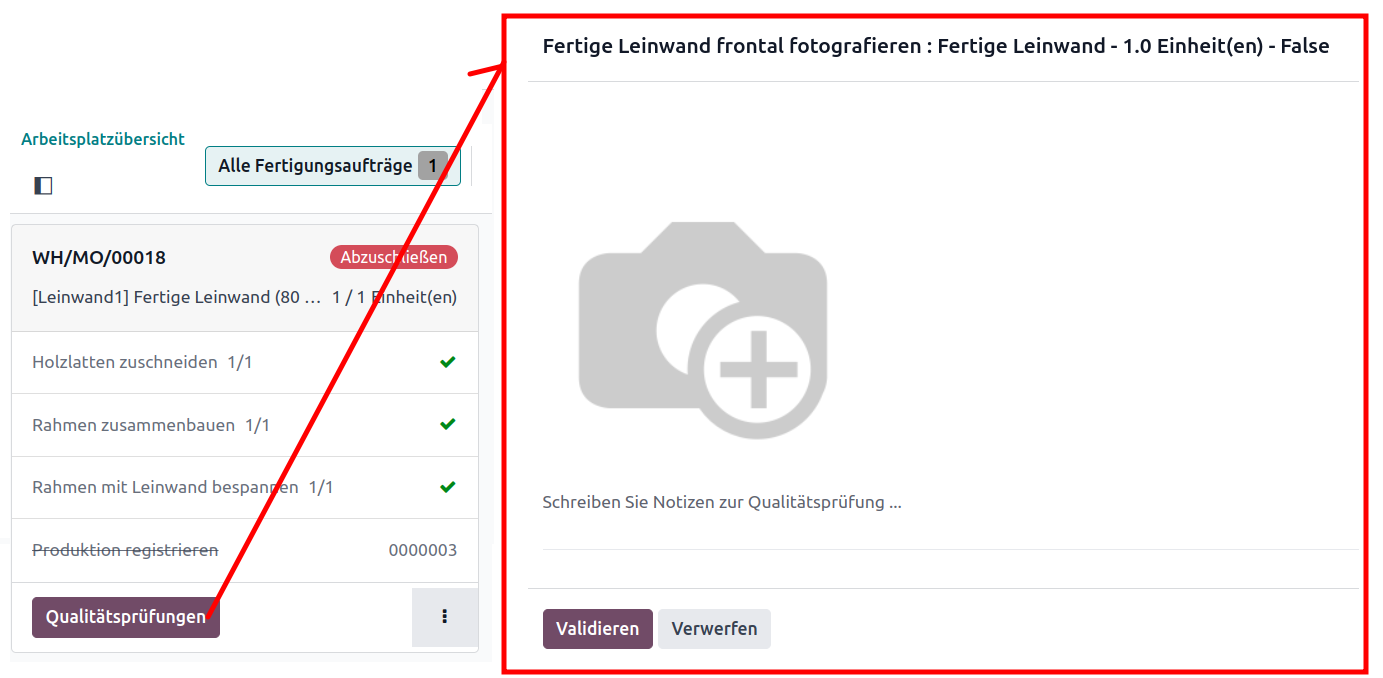
On the right, we select the inspection (per product, quantity or process) and the inspection frequency (all, random, regular). There are also various inspection types to choose from, such as a photo or the recording of by-products. Other central configuration points are the responsible inspection team and the error locations if the quality inspection is not passed.
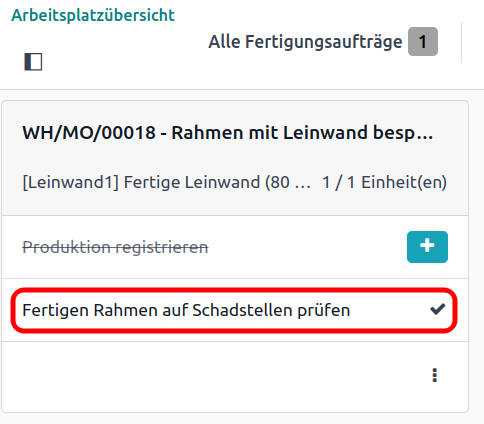
Once all relevant quality control points have been defined, we have completed the configuration and can start producing our screen. The individual quality control points to be carried out for a parts list are shown in the parts list itself. Once production with operations plus quality checks has been completed, all the checks carried out and their results can be found in the production order under the "Quality checks" smart button.

Changed results are also registered. For example, if an employee measures 98 mm for the first time when measuring, an error message appears and states that 100-102 mm is tolerated, and the entry is then changed to 101 mm, this is recorded in the chatter of the respective quality control.
Sometimes not all quality controls can be found in the list at first glance. To display all controls, the filter in the search bar must be removed.

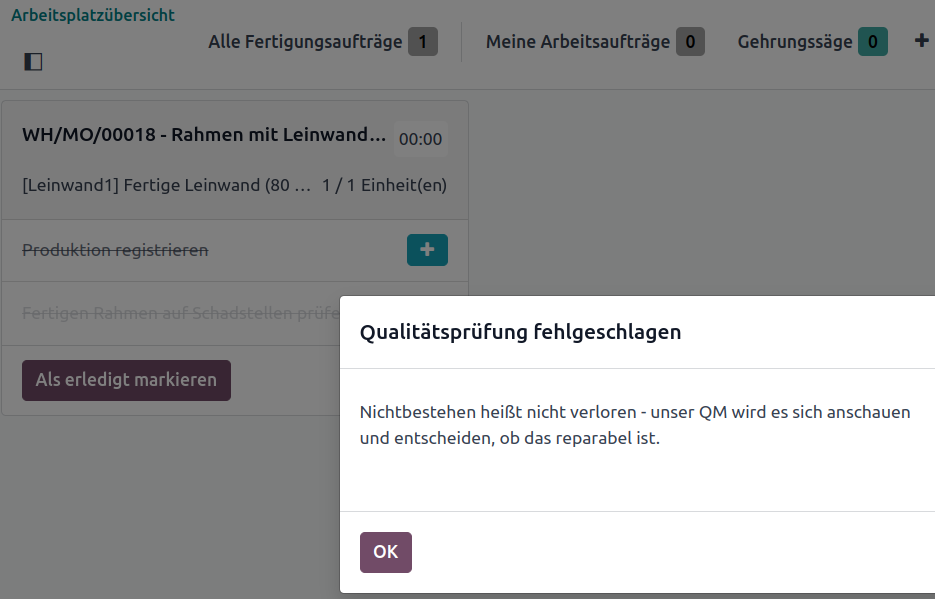
By default, production can be completed in Odoo despite failed quality inspections. This is to prevent the entire production process from coming to a standstill. It is also good to know that production can also be carried out using the barcode scanner. All steps, products and batch numbers need a barcode for this.
There is currently still an inadequacy in Odoo if a quality check is to be carried out "per operation": It is then possible to simply complete production even though no quality checks have been carried out. In this case, these are nevertheless marked as "successfully completed". Odoo will make improvements here. However, if you need this adjustment earlier, you are welcome to contact us.
We have then summarized all the important process steps for the production of the screen in a slideshow.


Do you need support for mapping your production in Odoo? Contact us now, we are at your side for all questions and even complex cases!
Sources: www.odoo.com